
AiM Dashes and SmartyCams
The best content is on the forums for the AiM dash, data downloads, and using your SmartyCam.
These fantastic products work together as one unit. If ordered with your car, no customization is necessary for good results. However, if you want to start adding more data overlays or learning from your data, you might benefit from the following:
- How-To: Configure Your Smartycam - Throttle, Brake, Overlays and More!
- How-To: Create Custom AiM Dash Layouts
- How-To: Export a lap video from RaceStudio 3
- How-To: Render Video Without a SmartyCam
See also the section on Dash Alarms, which are managed in RaceStudio 3, and the Dash Channel Reference for the canonical channel names in the factory config.
AiM Config Downloads
Section titled “AiM Config Downloads”Rush Auto Works publishes versioned config releases on GitHub. Download the .zconf2 file that matches your dash and car type, then import it in RaceStudio 3 under Configurations → Import.
Custom Sensors
Section titled “Custom Sensors”If your car has aftermarket sensors (fuel level sender, brake pressure transducers, etc.), you’ll need to install the matching sensor definition in RS3 before it can read the channel correctly. Sensor files (.snsr) are available in the latest release alongside the config files.
Installing a Fuel Level Sender
Section titled “Installing a Fuel Level Sender”Rush SRs with the optional fuel level sender use a custom calibration curve.
If you need to set up a fuel sender manually (e.g., switching to the 12-gallon endurance tank, or starting from a non-Rush config):
- Download the appropriate sensor file from the releases page:
- 6gal fuel level sender.snsr — for the standard 6-gallon Rush SR tank
- 12gal fuel level sender.snsr — for the 12-gallon endurance tank
- In RaceStudio 3, click the Custom Sensors button in the toolbar (the fluid temperature icon shown below), then click Import and select the
.snsrfile.
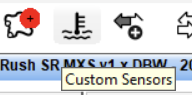
The Custom Sensors button in the RS3 toolbar.
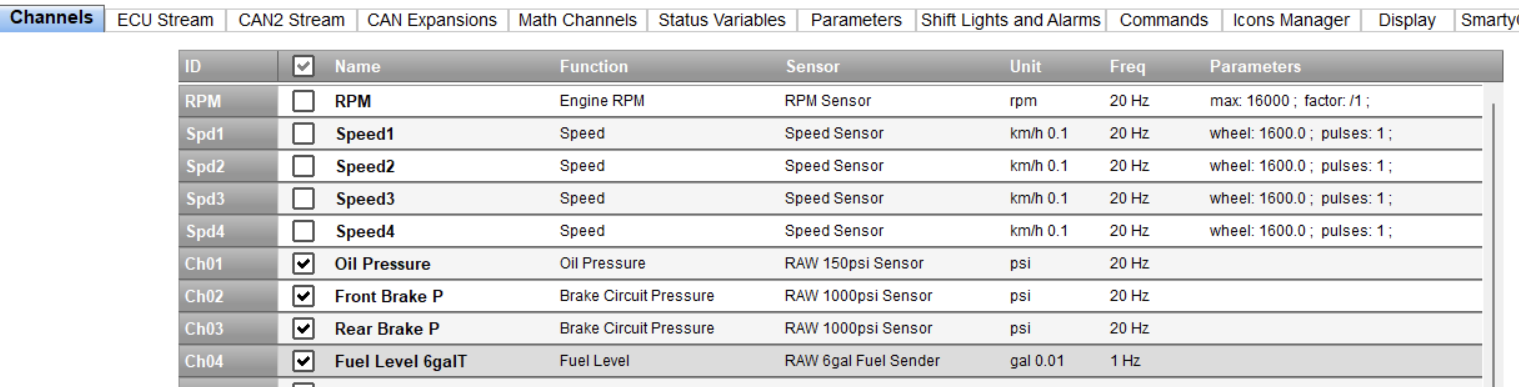
Channels tab showing sensor assignments. Ch04 is the fuel level channel.
- In the Channel Settings dialog, set Function to “Fuel Level” and click the Sensor dropdown. Select Custom, then choose the Rush fuel sender you imported (e.g., “RAW 6gal Fuel Sender”).
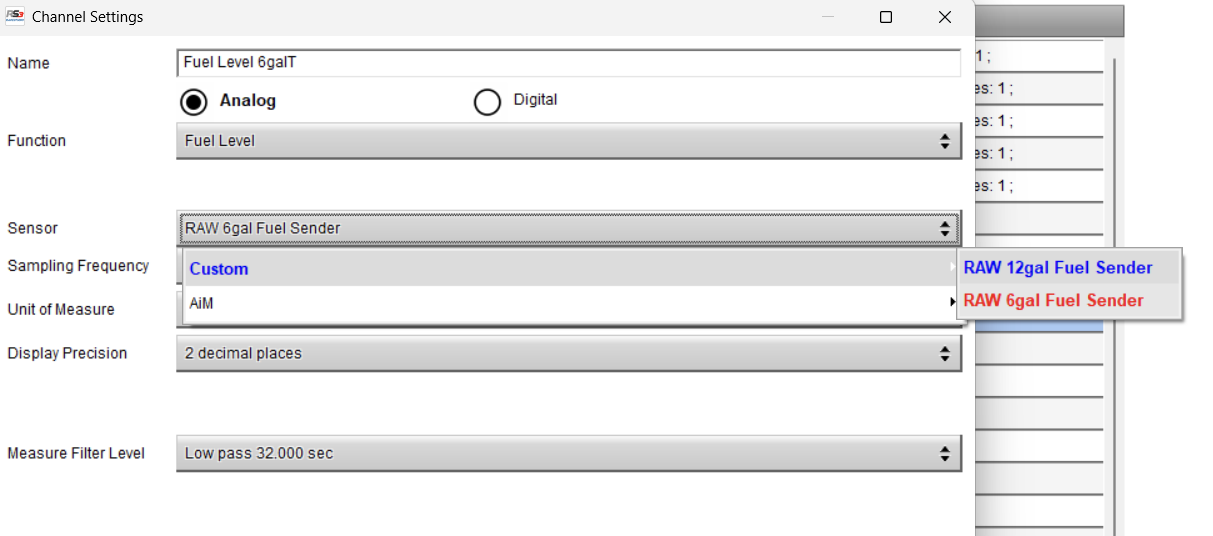
Selecting the custom fuel sender sensor under Custom sensors.
- Click Save, then Transmit the configuration to your dash.
What the fuel level reading is good for
Section titled “What the fuel level reading is good for”Treat it as a coarse gauge, not a number. Do not plan a stint on it.
The 6-gallon and 12-gallon cells are a hostile place to measure a level (see Fuel Tanks for which one you have):
- Slosh dominates everything else. Under cornering load the sensor reads whatever fuel happens to be sitting on it, which on a road course is almost never the average level. An instantaneous reading is close to meaningless. Only a reading averaged over tens of seconds is worth looking at, which is why the number settles when you slow down and jumps around when you do not.
- The tank is not a box. Volume against height is non-linear, and it flattens out at both ends of the range, which is exactly where you want to know.
- The safety foam gets in the way. It displaces volume, holds fuel that never reaches the pickup, and obstructs a float. It also degrades with age, which is why it is on a replacement interval of its own, so a calibration that was right when the cell was new drifts as the cell gets older.
None of that is a fault in the sender, and no amount of recalibration fixes it. It is what measuring a moving liquid in a foam-filled cell gets you.
On a 5-gallon ATL car the cell is a different shape and the sender and calibration differ, so a reading that is wrong in a consistent way there is worth investigating rather than accepting.
Count fuel used instead of reading fuel left. Track consumption per lap across a session, subtract from a known fill, and work in laps remaining. That is the number a driver actually wants, it does not care about slosh, and it only needs resetting when you fill.
If the reading looks wrong, check the sensor definition and the calibration curve first (above), since a mismatched curve produces a confidently wrong number rather than a noisy one. But a gauge that wanders under load is behaving normally.
Adding Fuel Level to Your Dash Display
Section titled “Adding Fuel Level to Your Dash Display”Once the fuel sender is configured, you can add it to any dash page:
- Go to the Display tab and click on the dash page you want to edit.
- Click on a display location where you want the fuel level to appear.
- In the channel selector, choose A/D Channels → Fuel Level 6galT.
- Click Save, then Transmit.
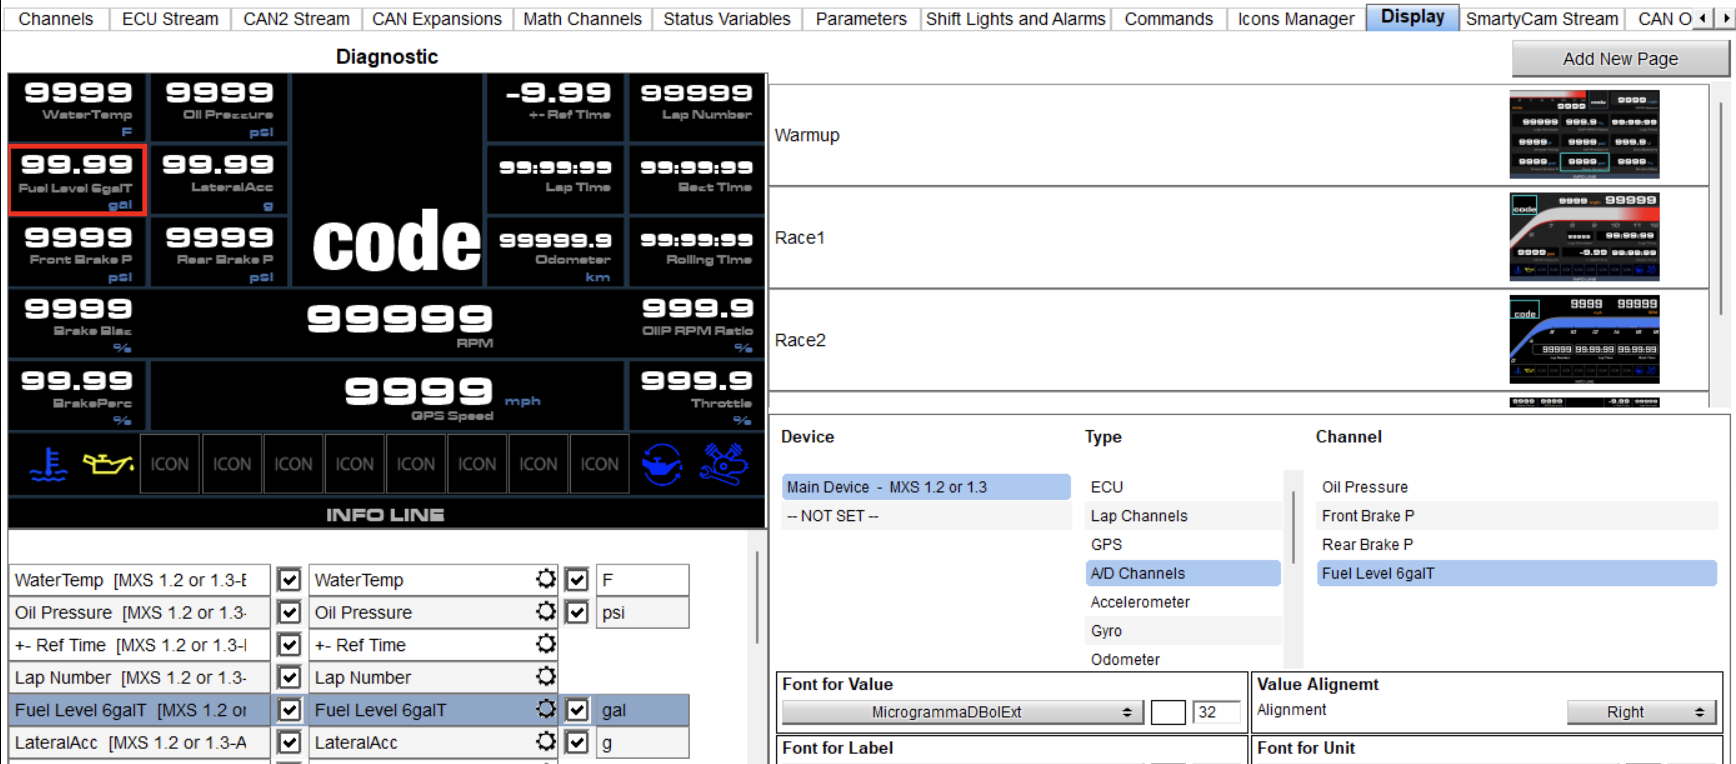
Adding Fuel Level to a dash page. Select the location, then pick Fuel Level 6galT under A/D Channels.
Upgrading MXm to MXS
Section titled “Upgrading MXm to MXS”The MXm and every version of the MXS (1.x and 2) are drop-in interchangeable on the Rush SR. To swap:
- Disconnect the motorsport connector from the back of the existing dash logger.
- Unbolt the dash from the panel.
- Bolt on the new dash logger.
- Reconnect the motorsport connector.
SmartyCam Compatibility
Section titled “SmartyCam Compatibility”Both the SmartyCam single (HD) and SmartyCam dual work with either the MXm or any version of the MXS.
The SmartyCam box connects to the dash logger harness with a CAN cable plugged into the CAN EXT connector (labeled CAN EXT 2 on MXm harnesses).
The dual SmartyCam additionally needs 12V and ground. Rush’s factory install uses a short pigtail that taps 12V from the back of the dash switches and grounds via a ring terminal on one of the bodywork pin plates.